
Friction Folder Knife – DIY project approach..
Step 4: Drill Precision Holes for Pins:
- Mark Hole Locations:
- Before drilling, mark the locations on both handle scales where the holes will be drilled.
- Use a pencil or a scribe to ensure accuracy.
- Make sure the holes align perfectly, as any misalignment can affect the overall performance of your friction folder knife.
- Not positions when aligned side to side, avoid flipping one side in the final assembly process or the materials will not fit correctly during final fit and finish.
- Choose the Right Drill Bit:
- Select a drill bit that matches the diameter of the pins or rivets you’ll be using. T
- he size should be uniform for both handle scales to ensure a snug fit. It’s crucial to use the right size to prevent any wobbling or play in the final assembly.
- Verify drill bit is tight in chuck to avoid grabbing the material while drilling, and potentially destroying the material. Or even injury to yourself.
- Secure the Handle Scales:
- Clamp or secure the two handle scales together using a vise or clamps.
- This ensures that both pieces are aligned precisely, and the holes will match perfectly when drilled.
- Drill Carefully:
- Start drilling through both handle scales, making sure to keep the drill bit perpendicular to the material.
- Drill slowly and steadily to avoid any splintering or damage to the handle material.
- If you’re using wood, consider using a backer board to prevent tear-out of the handle surface.
- Verify Hole Alignment:
- After drilling the holes, separate the handle scales and check the alignment of the holes.
- Use a pin or dowel to insert through the holes to ensure they align perfectly.
- Any misalignment can be corrected by carefully enlarging the hole with a round file.
- If needed step up pin size and re-drill components as necessary.
Test Fit Blade to Handle:
- Check Blade Pivot:
- With the holes drilled, temporarily insert the pins or rivets through the handle scales without epoxy.
- Place the blade between the scales and secure it with the pins.
- Verify that the blade can pivot smoothly.
- If there’s any stiffness or resistance, you may need to adjust the hole size or make slight modifications to the blade.
- Verify Blade Centering:
- Close the knife and observe the centering of the blade within the handle.
- It should be aligned in the center without touching the handle scales on either side.
- Adjustments may be necessary to achieve proper centering by enlarging or shifting the holes slightly.
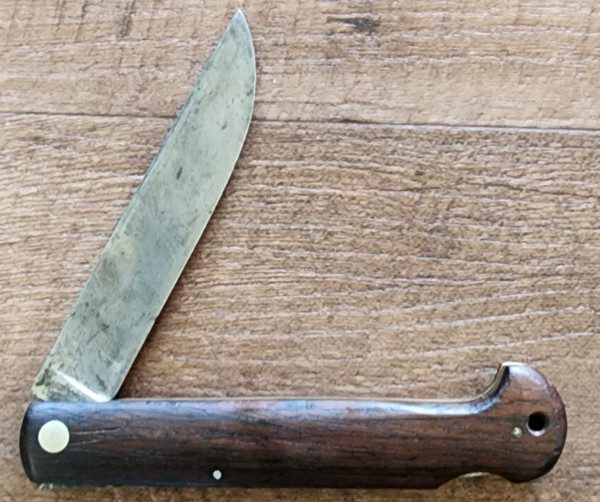
- Check Blade Alignment in the Open Position:
- Open the knife and ensure that the blade aligns perfectly with the handle when fully extended.
- The blade should not touch or rub against the handle scales.
- Make any necessary adjustments to the hole placement or size to achieve optimal alignment.
- Verify Secure Closure:
- Close the knife and check for a secure closure without excessive play.
- The blade should remain firmly in place without wobbling.
- If there is any play, you may need to adjust the size of the holes or modify the blade for a snug fit.
- Make Incremental Adjustments:
- It’s crucial to make incremental adjustments and test the fit regularly.
- This ensures that you achieve a precise fit without overdoing it.
- Fine-tune the hole sizes or blade dimensions as needed until you are satisfied with the fit in both open and closed positions.
By following your detailed planning, use test sizing steps, you can drill holes with precision and verify the fit of the blade to the handle in both open and closed positions before proceeding to the final fit and finish using epoxy or mechanical fasteners. A well planned out, and meticulous approach ensures that your friction folder knife operates safely and smoothly. While fully meeting the end users expectations.

By using this site you're accepting
our Online Sales Disclaimer
*Must Be 18 years or older to purchase*