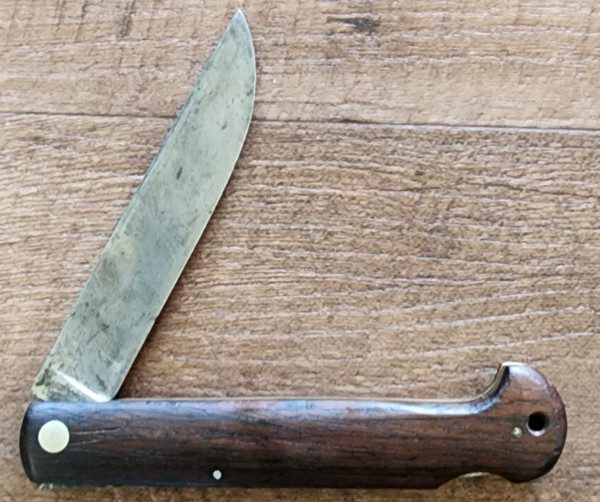
Friction Folder Knife – DIY project approach..

Step 6: Shape the Handle – Crafting a Comfortable Grip:
Shaping the handle is a crucial step in the knife-making process, as it directly impacts the comfort and functionality of your friction folder knife. With the blade secured, start shaping the handle using files, rasps, and sandpaper, paying special attention to the overall ergonomic design:
- Secure the Knife:
- Ensure the blade is securely attached between the handle scales using pins or rivets.
- Use a vise or clamps to stabilize the knife, preventing any movement during the shaping process.
- Contouring with Files:
- Begin by using a coarse file to remove excess material from the handle scales.
- Work gradually and maintain a symmetrical shape on both sides.
- Focus on achieving a comfortable grip that suits your hand size and ergonomic preferences.
- Creating Finger Grooves:
- To add finger grooves for improved grip, start by marking the desired locations on both sides of the handle.
- Typically, you’ll create a groove along the back and sides of the handle where the fingers naturally rest.
- Using Rasps for Detail:
- Switch to rasps to refine the contours and create more intricate shapes, especially in the finger grooves.
- Rasps allow for greater precision and help you achieve the desired ergonomic profile.
- Check and Adjust:
- Periodically check the handle’s shape and test the grip to ensure it feels comfortable in your hand.
- Make adjustments as needed, paying attention to any areas that may cause discomfort or hot spots during use.
- Smooth Out Rough Edges:
- Once the basic shape is achieved, switch to finer grit files and sandpaper to smooth out any rough edges.
- Pay close attention to the transitions between different sections of the handle, ensuring a seamless and polished finish.
- Create Finger Grooves Across the Back and Sides:
- For finger grooves, use a round file or a specialized file with the desired curvature.
- Begin by creating a gentle curve where the back of the handle meets the spine of the blade.
- This curve may accommodate the palm, and possibly parts of the fingers when gripping the knife, so give variable hand sizes, and grip positions some extra consideration while sizing.
- Create deeper grooves or drop-sections where the palm and fingers naturally rest, and form the sides of the handle with smooth transitions.
- The grooves and drop-sections should be comfortably sized and spaced to provide a safe and secure grip.
- Check the finger grooves and drop-sections for smooth transitions, grip consistency and overall comfort.
- Making adjustments as necessary before proceeding. The goal is to achieve a handle shape that enhances the overall usability, safety and aesthetics after final assembly of your knife.
- Final Check and Evaluation:
- Perform a final check of the handle shape, ensuring that it aligns with your design and ergonomic goals.
- Pay attention to the overall aesthetics and functionality, making any last-minute adjustments to achieve the desired result.
By carefully shaping the handle and incorporating well-designed finger grooves, you not only enhance the visual appeal of your friction folder knife but also optimize its usability. The attention to detail in this step contributes significantly to the overall craftsmanship of your handmade knife. Once satisfied with the handle shape, you can proceed to the next steps of sanding, finishing, and final assembly with epoxy.

