
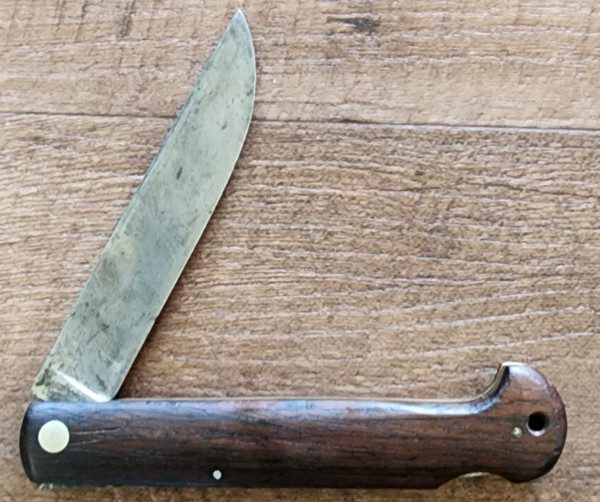
Friction Folder Knife – DIY project approach..
Step 9: Final Assembly – Precision Epoxy Application:
The final assembly of your friction folder knife involves carefully disassembling, applying epoxy, and reassembling the components. Follow these detailed steps to ensure a secure and durable bond:
- Disassemble the Knife:
- Carefully remove the pins or rivets to disassemble the knife.
- Keep track of each component to simplify the reassembly process.
- Prepare the Surfaces:
- Thoroughly clean and degrease the mating surfaces of both the blade and the handle scales.
- Dry all surfaces thoroughly to help ensure the epoxy will bond effectively.
- Apply Epoxy:
- Mix the epoxy according to the manufacturer’s instructions.
- Apply a small amount of epoxy to one of the handle scales.
- Use a toothpick or a small applicator to spread the epoxy evenly across the surface.
- Reassemble the Knife:
- Place the blade between the handle scales, aligning the holes for the pins or rivets.
- Carefully insert the pins or rivets through the holes to secure the components together.
- Ensure that everything aligns perfectly.
- Check Alignment:
- Before the epoxy starts to set, double-check the alignment of the blade within the handle.
- Verify that the blade can pivot smoothly and that the handle scales are flush against the blade.
- Wipe Off Excess Epoxy:
- Use a clean cloth or cotton swab to wipe off any excess epoxy that may have squeezed out during reassembly.
- Thoroughly clean all residues as this is crucial for a clean and professional looking finish.
- Secure in a Vise or Clamps:
- Once the knife is fully assembled, secure it in a vise or with clamps.
- This ensures that the components remain in place and that the epoxy cures under pressure for a stronger bond.
- Allow Epoxy to Cure:
- Follow the epoxy manufacturer’s recommended curing time.
- This typically involves leaving the assembled knife undisturbed for several hours or overnight.
- Ensure that the environment is at the recommended temperature for optimal curing.
- Avoid excessive heat near any applied epoxy as it can destroy it’s ability to cure correctly.
- Clean Up:
- After the epoxy has fully cured, remove the knife from the vise or clamps.
- Trim any excess pin material if needed and clean up any remaining epoxy residue using a fine abrasive or sandpaper.
- Final Inspection:
- Inspect the knife for any imperfections or irregularities.
- Ensure that the blade opens and closes smoothly, and the handle is securely attached.
- Make any final adjustments if necessary.
- If Acetone is needed to make any corrective adjustments, restart assembly steps from the beginning…. Amen.. =/
By following a set of well planned, detailed steps, you help ensure a meticulous and precise final assembly of your friction folder knife. The use of epoxy provides a strong and durable bond between the handle scales and the blade, resulting in a professionally crafted and functional custom knife. With careful attention to detail and safety, you may be able to create your own handmade friction folder. A knife that could be showcased, or if intended, put to practical use.

By using this site you're accepting
our Online Sales Disclaimer
*Must Be 18 years or older to purchase*